Quick Start - Dialog
Please follow these simple steps to quickly setup dialog spell checking in a web application. If you have any questions at all please contact us at support@keyoti.com
For MVC usage please see this page
|
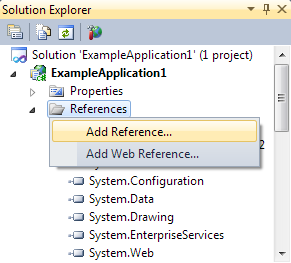
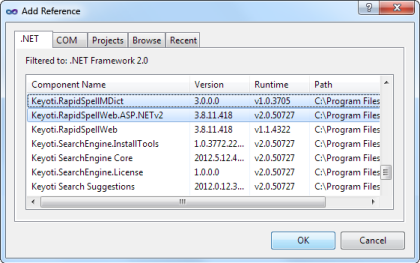
Step 2. Reference the appropriate DLLs for your .NET version:
C:\Program Files (x86)\Keyoti Inc\RapidSpell Web .NET v6\NETCLR_v4_BIN
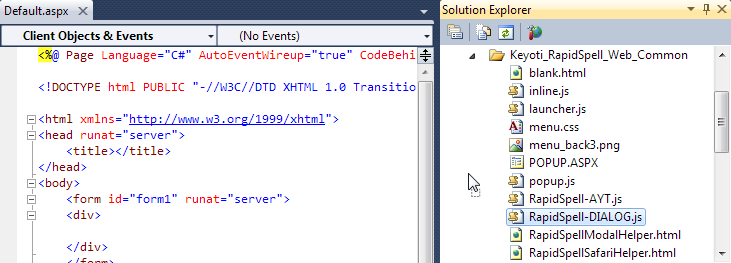
Step 3 Step 4. Add the client files to a folder under the user web application:Create a folder within the web application, copy the files from the 'Keyoti_RapidSpell_Web_Common' folder and then, from within the Solution Explorer, paste them to your new folder. .NET 2 (3/3.5) users, please check for and delete RapidSpellService.svc from the copied Keyoti_RapidSpell_Web_Common if it is present. (the 'Keyoti_RapidSpell_Web_Common' folder can be found under the product installation, typically; 
Step 5 Step 5. Add the 'script src' tag to the page:To automatically add the script tag, drag RapidSpell-DIALOG.js from the Solution Explorer on to the page source. This will add the <script type="text/javascript" src="RapidSpell-DIALOG.js"></script> tag to the page with the correct path. 
Step 6 Step 6. Trigger the spell check using Javascript.E.g. In a button click handler;<input type="button" onclick="rapidSpell.dialog_spellCheck()" value="Spell Check" /> or for a specific text box<input type="button" onclick="rapidSpell.dialog_spellCheck(true, 'textBoxID')" value="Spell Check" /> 
Step 7 Step 7. Select the page with the text box as your start page, and run!Note: To disable spell check on specific text boxes add the attribute nospell="true" to the text box. Note: To remove the 'Add' option set the dictionary path to an empty string; rapidSpell.setParameterValue('default', 'UserDictionaryFile', ''); 
|
||||||||||


