|
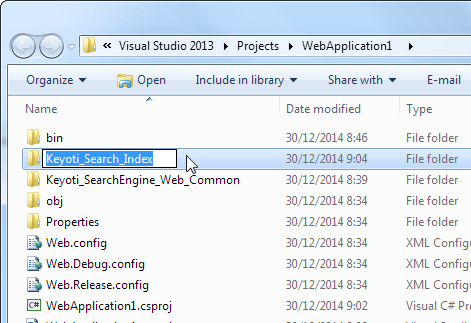
Step 2. Create a new folder to store the index files;
- Open the project folder in File Explorer
- Create a new folder called 'Keyoti_Search_Index'


|
Next
Step 3. Open the Index Manager Tool from the Start Menu and enter the path to your index directory.
The Index Manager Tool can be found under the Start Menu;

Next
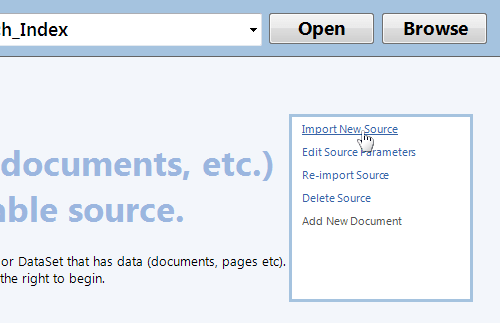
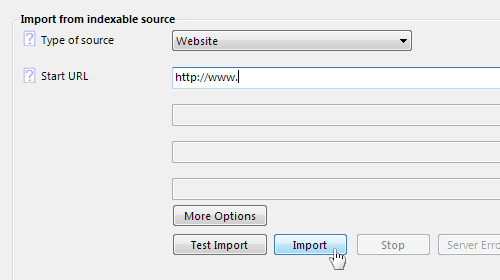
Step 4. Select 'Import New Source', enter the start URL & click 'Import'.


If an error reports the page cannot be read, please check the URL or consult the user guide for help.
Once the import is complete close the Import window, select 'Optimize' and click 'Start Optimize'.

Next
Step 5. Copy the SearchUnit scripts folder to your project;
- Open the SearchUnit install folder (via Start Menu or File Explorer).
- Copy the 'Keyoti_SearchEngine_Web_Common' folder.
- Paste to your application's Solution Explorer.

Next
Step 6. Add the SearchUnit JS and CSS tags to the head of your page.
To automatically add the tags, drag SearchUnit.js and SearchUnit.css from the Solution Explorer on to the page source. Alternatively copy and paste the tags as below to the head of your page.
<link href="Keyoti_SearchEngine_Web_Common/SearchUnit.css" rel="stylesheet" />
.NET 2 users must also add the following to all pages using SearchUnit (or set the variable from a common JS file).
Next
Step 7. Add the SearchUnit divs to your page.
<div id="sew_searchResultControl"></div>
sew_searchBoxControl is the search text box and button.
sew_searchResultControl is the search result control.
Next
Step 8. Run the web application (hit F5) and try a search!

Here a search was done for 'chicken' in the SearchUnit demo recipes project.
Go further!
Now you're ready to explore more features in SearchUnit, please take a look at the 'Features' page in the help for more information on all that SearchUnit can do.
